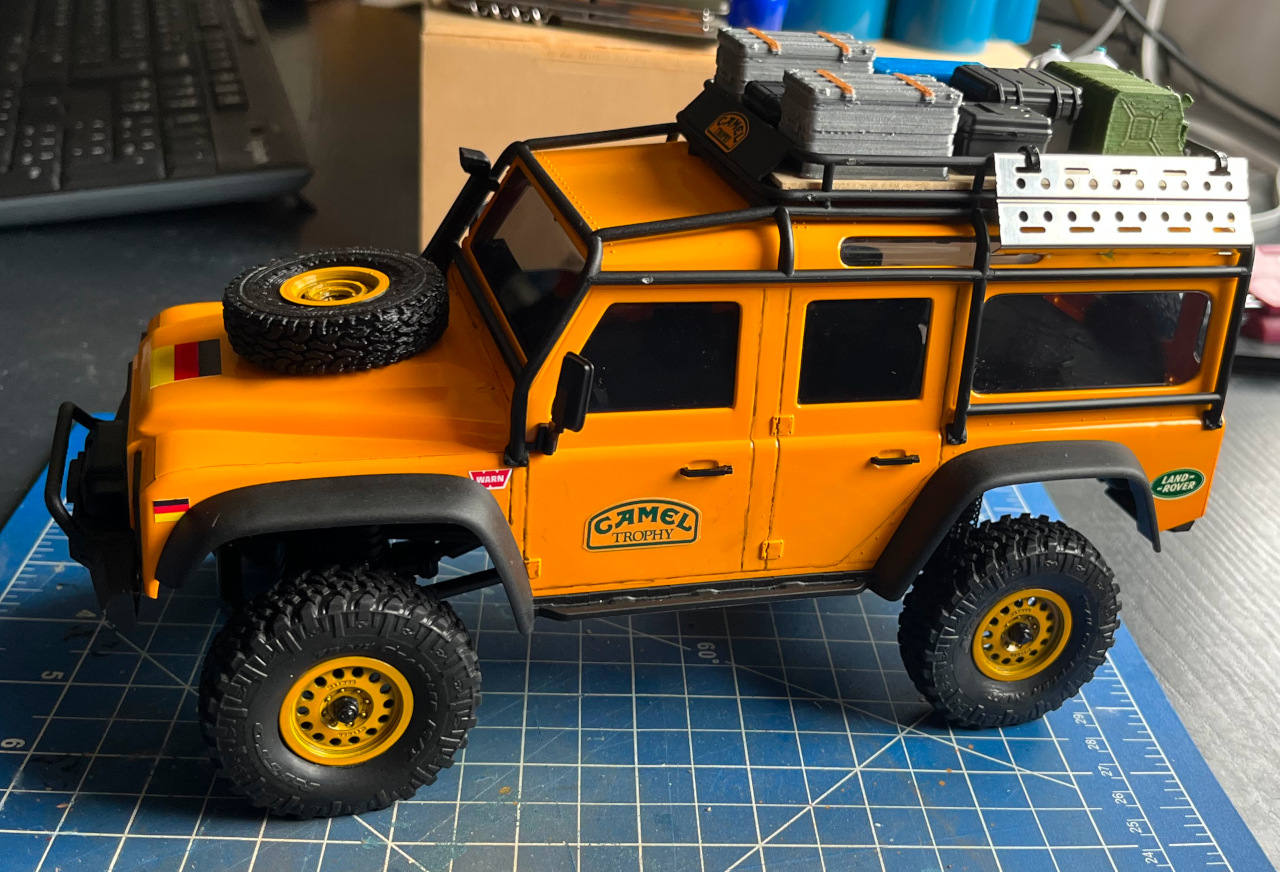
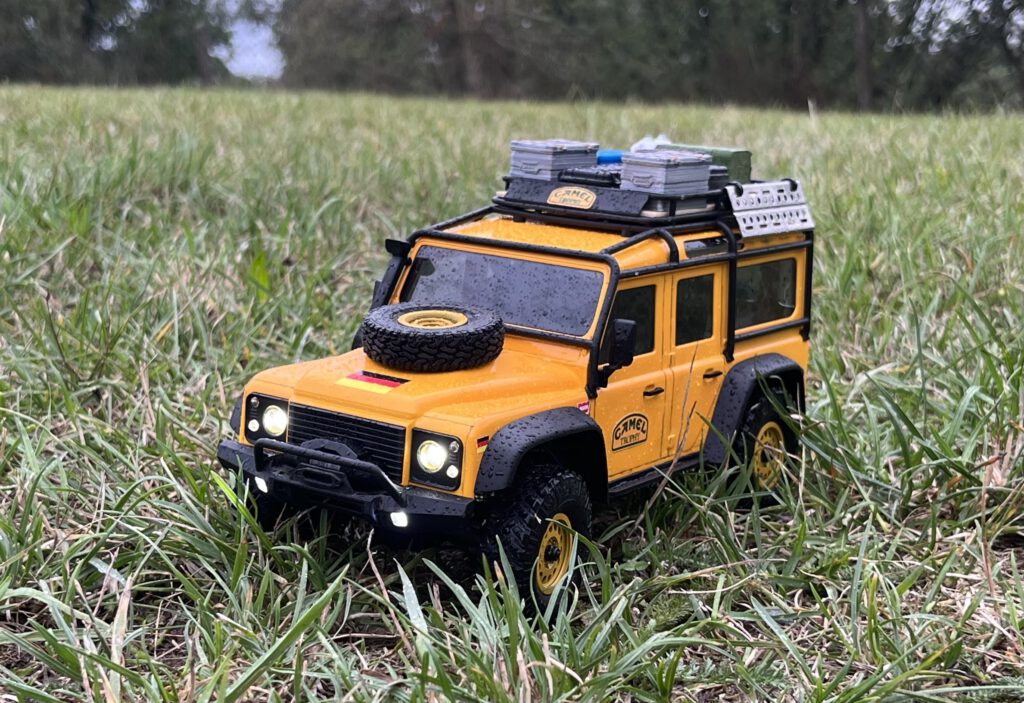
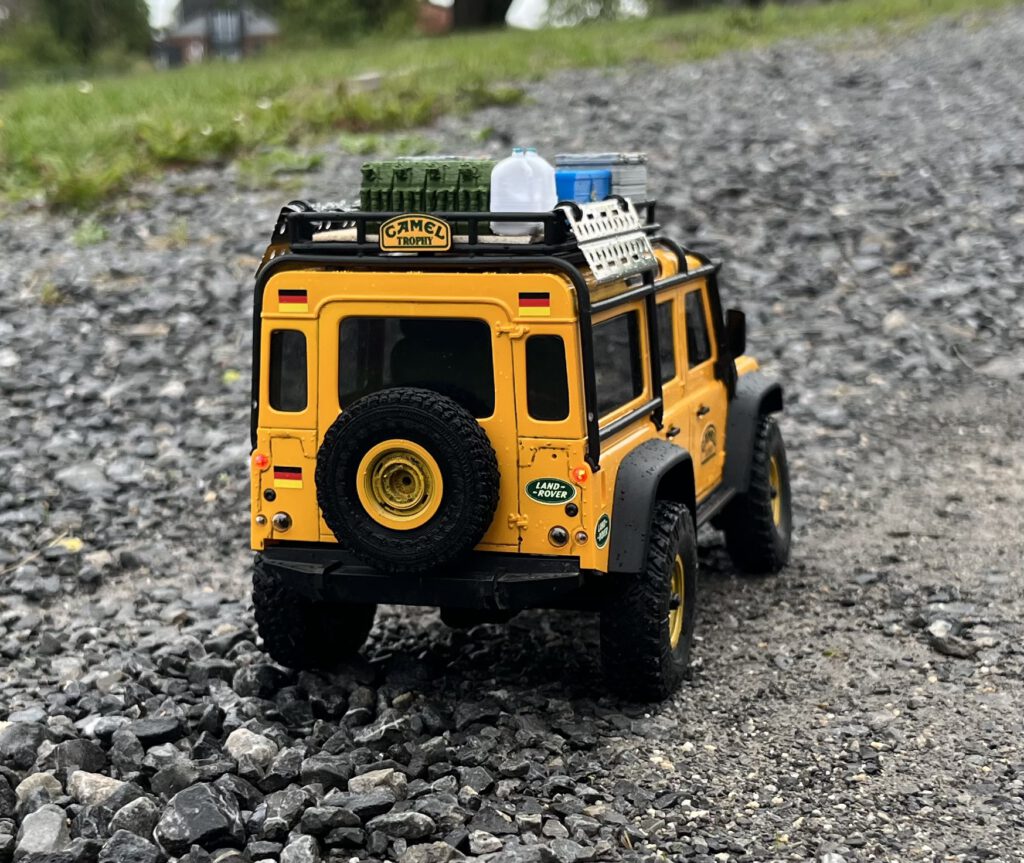
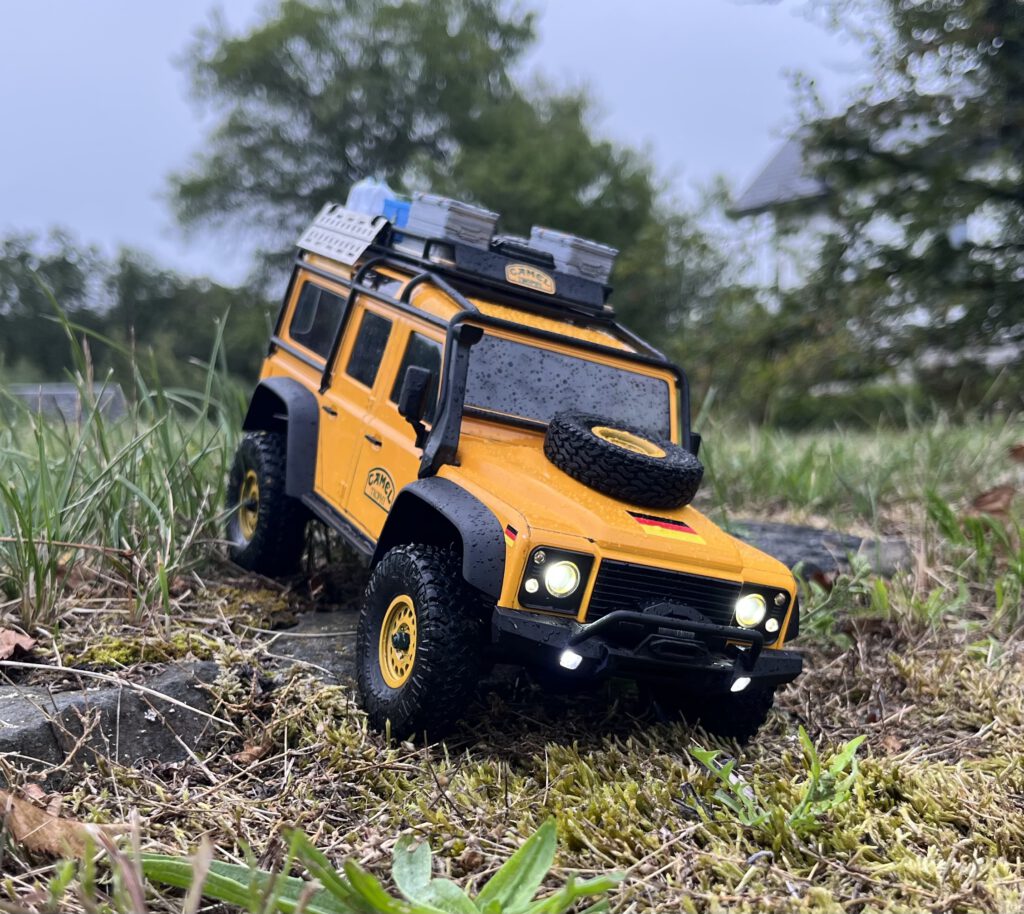
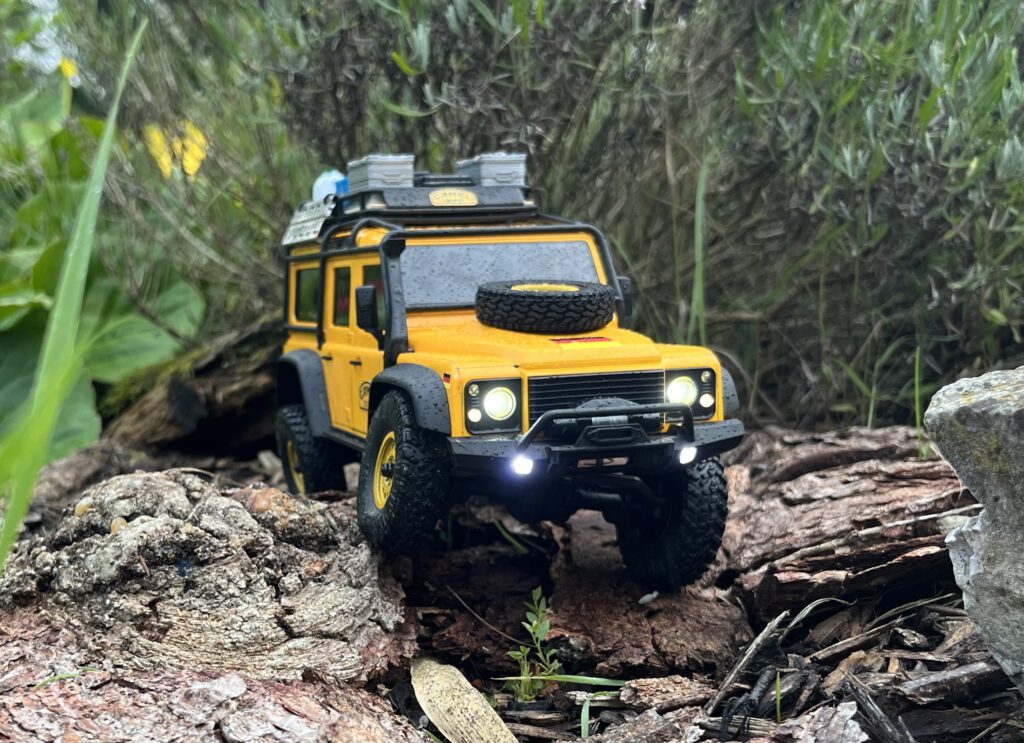
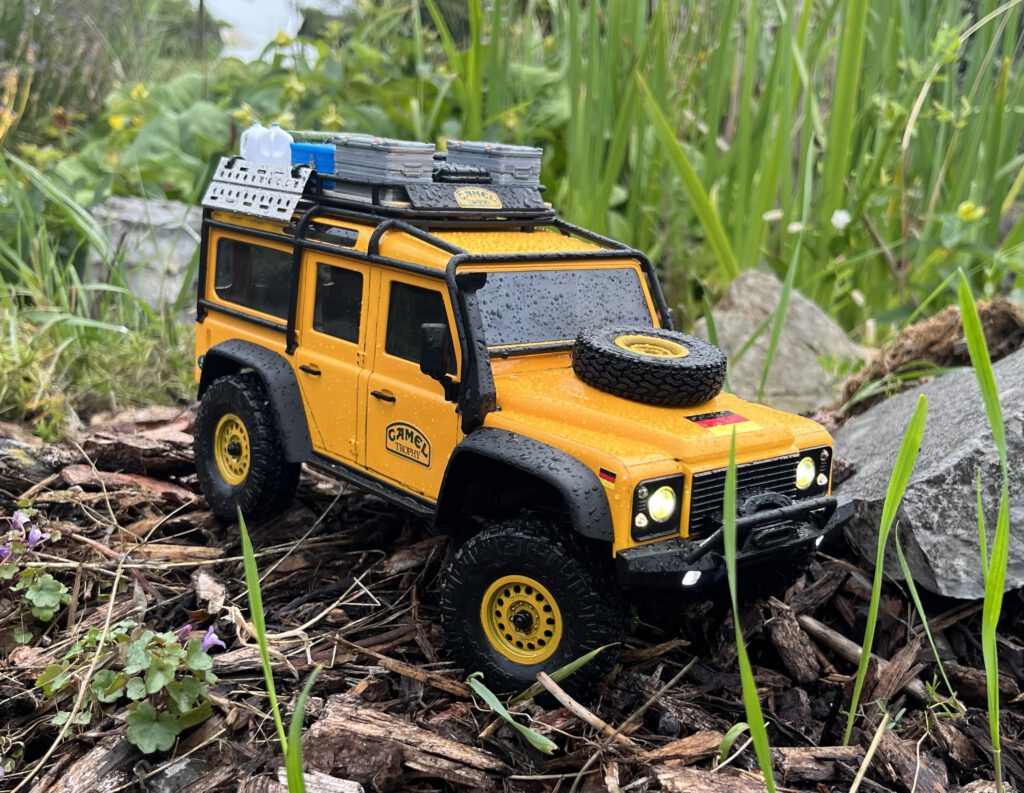
The final steps in my Camel Trophy build are applying the decals, mounting new tires and wheels and the accessories.
My decal sheet is from an eBay seller called screenprintdigital. Unfortunately the largest Camel Trophy logos, suitable for the doors, also had the Team Germany text below them. I careful got rid of that with scissors. Space on the wings is very limited due to the large fender flares. I managed to squeeze the smallest flags in at the front, placed a large flag on the hood and three medium–sized flags on the rear. The larger Land Rover logos were perfect for the rear quarter panels.
For tires and wheels I used SCX24 parts that I ordered directly from Horizon Hobby Germany. The Nitto Trail Grappler tires are much narrower than the stock tires and hence look much more realistic. I cut off the bolts off the Method MR307 wheels, then sanded them flush with 600-grid sand paper and painted them with the same color as the body. While not the same as the actual wheels used on the actual car, they are more old-school and thus a better fit than the stock wheels.
My Injora order came in as well. The Pelican cases are very nice and detailed and a good fit size-wise. The shovel is too large. The sand ladders look a bit different than those used originally and the raised edges are quite tall, but I don’t think that a 3D printed version would look better. I evaluated several options concerning the light bar that I ordered, but none of them please me. It doesn’t look to-scale. I considered completely disassembling it, printing a new housing and then rewire everything, but even then I’m not sure how I would tie it into the existing roof rack.
Pictures show what appears to be a sheet of plywoord on the roof rack. I cut a suitable piece from a thin sheet of balsa wood that I found in my parts bin. I’ll add a dab of glue to every item on top to keep them in place. I’ve also printed a shovel and axe to put on the hood, but I don’t know yet whether I actually like the look of them.
Here’s the end result: