The Tau (or T’au, as they are written now) are my favorite Warhammer 40K faction – as a matter of fact, they are the only faction that interest me both from a lore and a visual standpoint. I’ve long resisted the urge to start a Tau army (I even own a 4th edition codex that I bought new) because of the cost involved and my dislike for the 40K rules. But now that the new edition of Kill Team is around, and it being possible to take a single Pathfinder team as Kill Team, I decided to take the plunge and buy a box of Pathfinders.
Choosing a color scheme can be difficult, but by eliminating several choices (I don’t like painting white, especially after painting Stormtroopers – I’ve painted plenty of green and blue), I quite quickly arrived at the original tan/brown T’au scheme as my choice. Here are the paints I used, VMC is Vallejo Model Color, VGC is Vallejo Game Color.
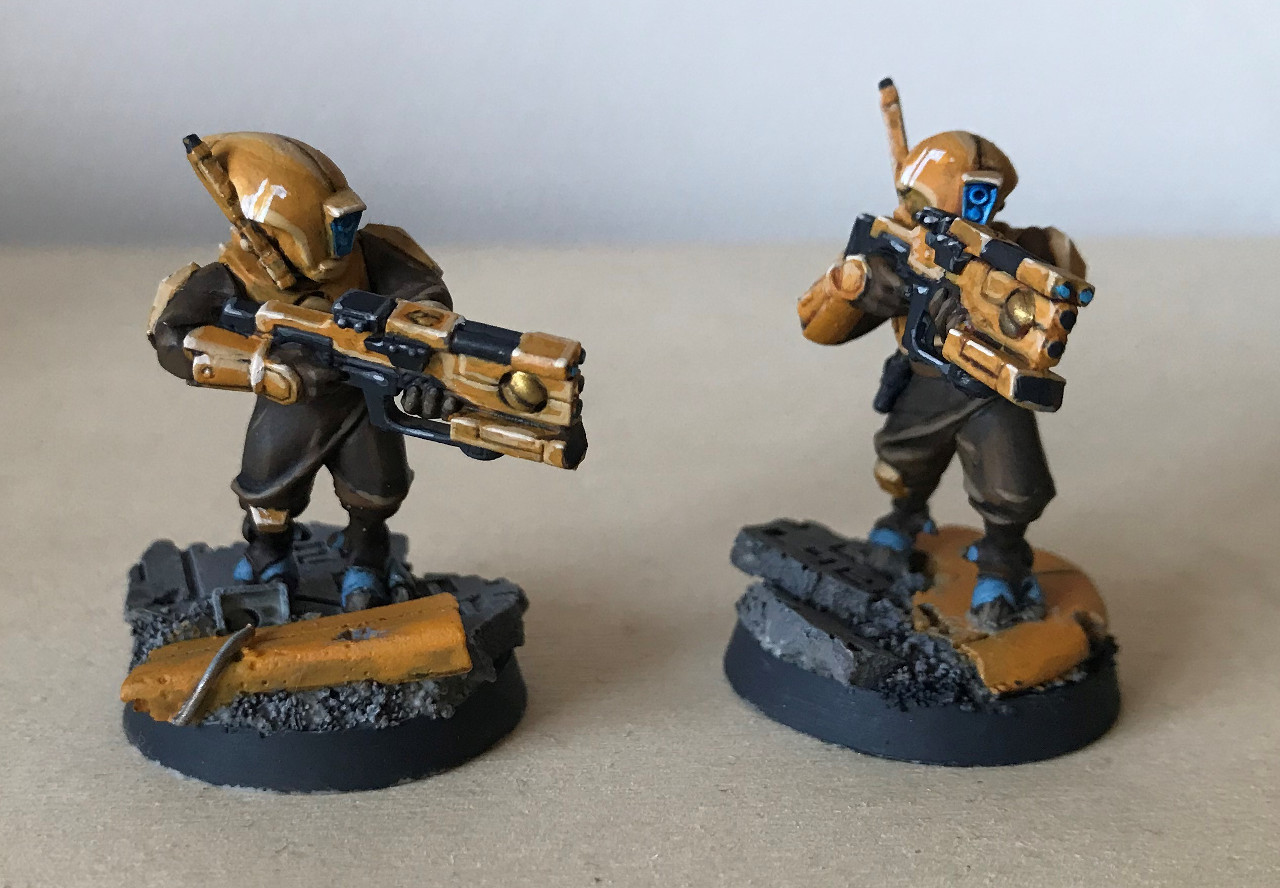
- Armor: VGC Filthy Brown, which is the Vallejo equivalent to the old Citadel Vomit Brown that was used for the original paint schemes. I do remember Vomit Brown to be a bit more orange though. I think that Citadel’s current Tau Light Ochre is even more on the yellow side. P3 Meaty Ochre is a tiny bit darker and more orange, and works well as shade for Filthy Brown. I sued P3 Bogrin Brown for darker camo patches on a Recon Drone.
- Armor highlights: VMC Iraqi Sand, the first highlight is approx. a 50/50 mix with Filthy Brown. Iraqi Sand is then further lightened with white.
- Fatigues: VMC Chocolate Brown
- Fatigue highlights: VMC Flat Earth and Old Wood.
- Black parts (weapons etc.): VMC German Grey, highlighted with VMC Neutral Grey and Sky Grey.
- Skin: VMC Pastel Blue.
- Hooves/Nails: VMC Old Wood over VMC Chocolate Brown.
- Pouches: P3 Traitor Green (although any other olive green, like VMC Russian Uniform WWII, would yield a similar result). I wanted a bit of green to break up the brown and tan.
- Gold parts: P3 Solid Gold.
- White markings: AK Interactive 3rd gen White, other whites that cover well will work, too.
- Lens glow: VMC Andrea Blue and VMC Sky Blue.
- Wash: P3 Armor Wash.
- Varnish: AK Interactive Ultra-matte varnish.
Since I did not want to mount the miniatures on the bases until after painting, I 3D printed a couple of simple cones (one line of code in OpenSCAD to create these) and stuck the miniatures on top with some blue tack-like gummy stuff that is used to mount posters. I wasn’t entirely happy with the stickiness, I also tried double-sided foam tape, which worked a bit better.
I started with the chocolate brown applied with an airbrush. I then brush-painted the armor panels, black, and gold parts. I applied the wash with a brush – quite generously on the fatigues, but directly to the creases on the tan panels to reduce the necessity cleanup. Then started the tedious process of cleaning up the armor panels, as the Filthy Brown needs at least two coats to cover well. After that is mostly highlighting and painting details such as the skin and hooves, and finally Sept markings. I finished by airbrushing the varnish. If I were to paint another unit, I would reverse the process – airbrush the armor color and brush-paint the cloth.
This was the first time I used a wet palette. And while I don’t think that you can do miracles with a wet palette, having your paint dry much slower is definitely nice. It is much easier to go back and forth between colors, as you don’t need to finish one color quickly before it dries. Blending two colors is also really easy, although it seemed to me as if e.g. in the case of the Filthy Brown and the Iraqi sand, one color would float on top of the other, meaning that you would have to stir them first before seeing the true color.