I used a spray can of Tamiya TS-34 “Camel Yellow” to paint the unpainted white Traxxas Defender body. I first cleaned the body with Isopropyl Alcohol (IPA). When using spray paint it’s important to use multiple thin coats, instead of trying to get good coverage in one go – this can lead to runners. Under my circumstances (temperature approx. 22 degrees C and low humidity) I found the paint to dry very quickly and only needed to wait maybe 20 minuted between coats. I went with about three coats for good coverage.
The paint dries to a satin finish. I’ve read that people polish Tamiya paints for a gloss finish, but I’m perfectly fine with the satin finish for my Land Rover.
After painting, I assembled the body. You should start with the windows and work from there. At this point, I realized that my body suffered a bit of mis-packaging: It included extra bumpers (which are not supposed to come with the unpainted body), but lacked the screws and stickers. I thus had to cannibalize the blue body that came with the car.
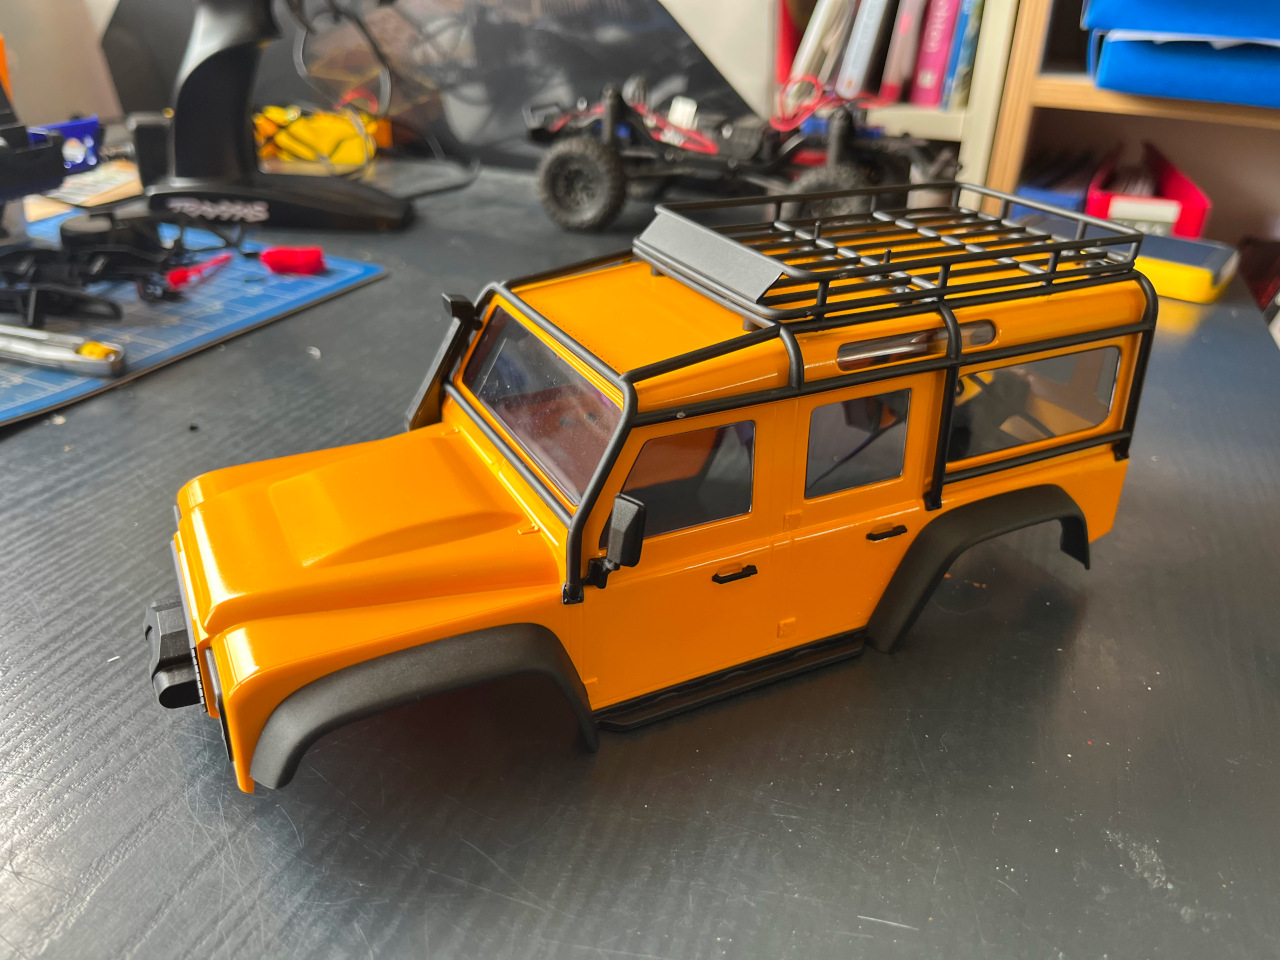
I took the opportunity to install the Traxxas light kit, which is a great accessory that is easy to add. You can switch between multiple modes, I’ve got it in first mode with headlights on. You can turn on the hazard lights by turning off the transmitter. Both the fender flares and the roof rack are held on with screws. The roof rack itself consists of three parts that are a bit fiddly to line up, and you need to melt the small pins to get it all to stay together. I did so with a USB soldering iron that I usually use for cleaning up 3D prints. I actually managed to install one part of the rack upside down (see the two pins facing upward in the image below), but this might come in handy at a latter stage when adding stuff to the rack.
Melting is required in other places, too – snorkel, mirrors, and door handles require it. If you don’t have access to a small soldering iron, heating up a small screw driver in a lighter flame might work, too.
Here’s the end result without stickers added yet. I’m happy with how it turned out, these spray cans are really easy to use. I’m now considering to add a bit more detail with paint. It would make sense to at least apply a dark wash to the recesses to get a bit more depth. I don’t want to go very far with weathering as this car will probably get dirty by itself once done.